Using the Advanced Search Tool
One of the most powerful, yet overlooked features in Lead management is the Advanced Search. This allows users to create much more complex and detailed reports, as well as use many additional criteria to find leads.
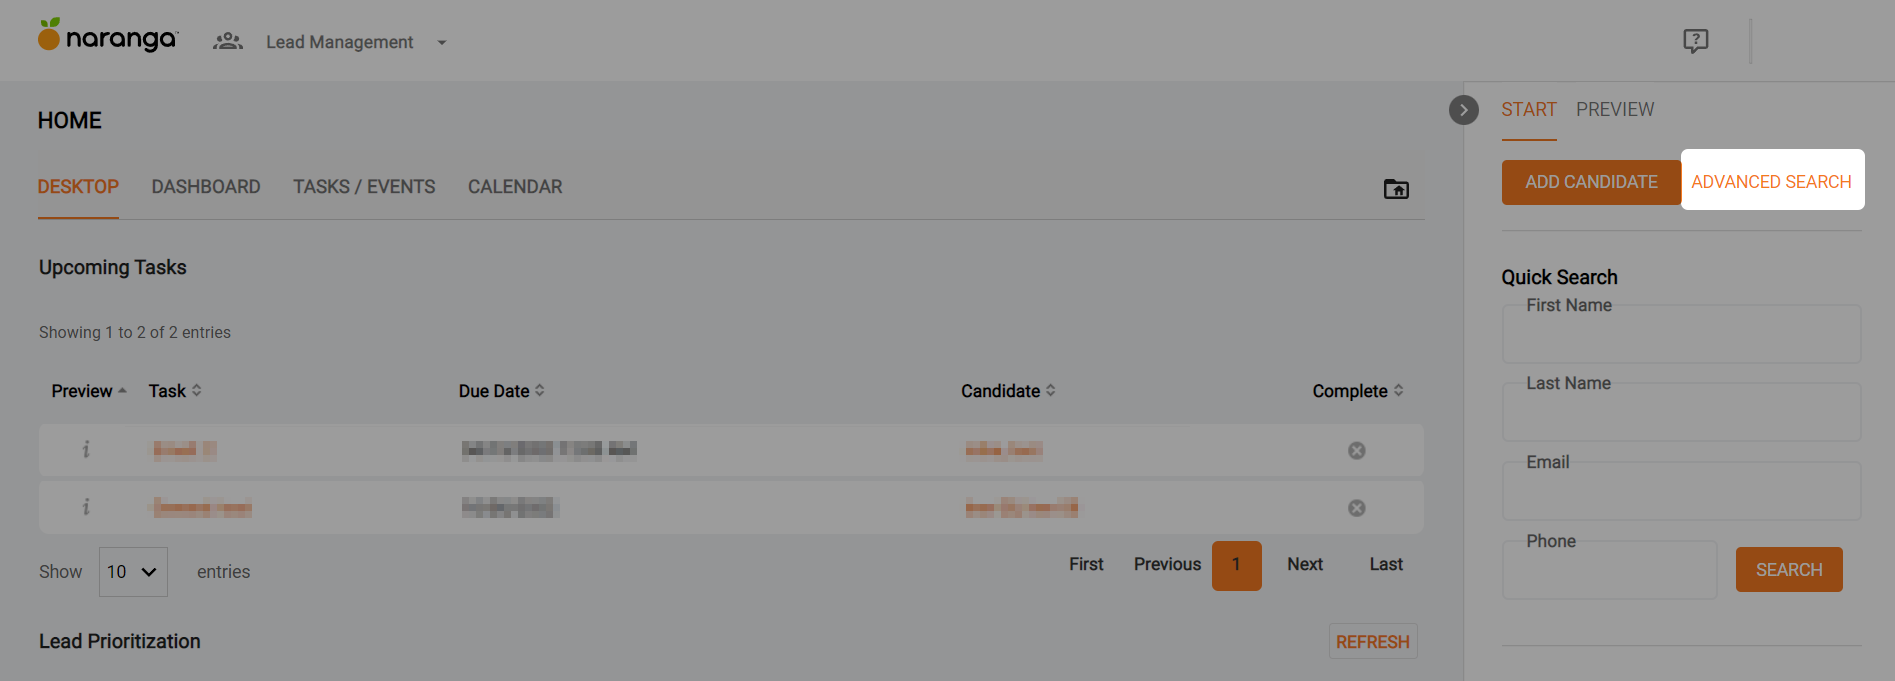
The easiest way to access the Advanced Search is by clicking the “Advanced Search” link next to the “Add Candidate” link above the “Quick Search” on the right-hand side.
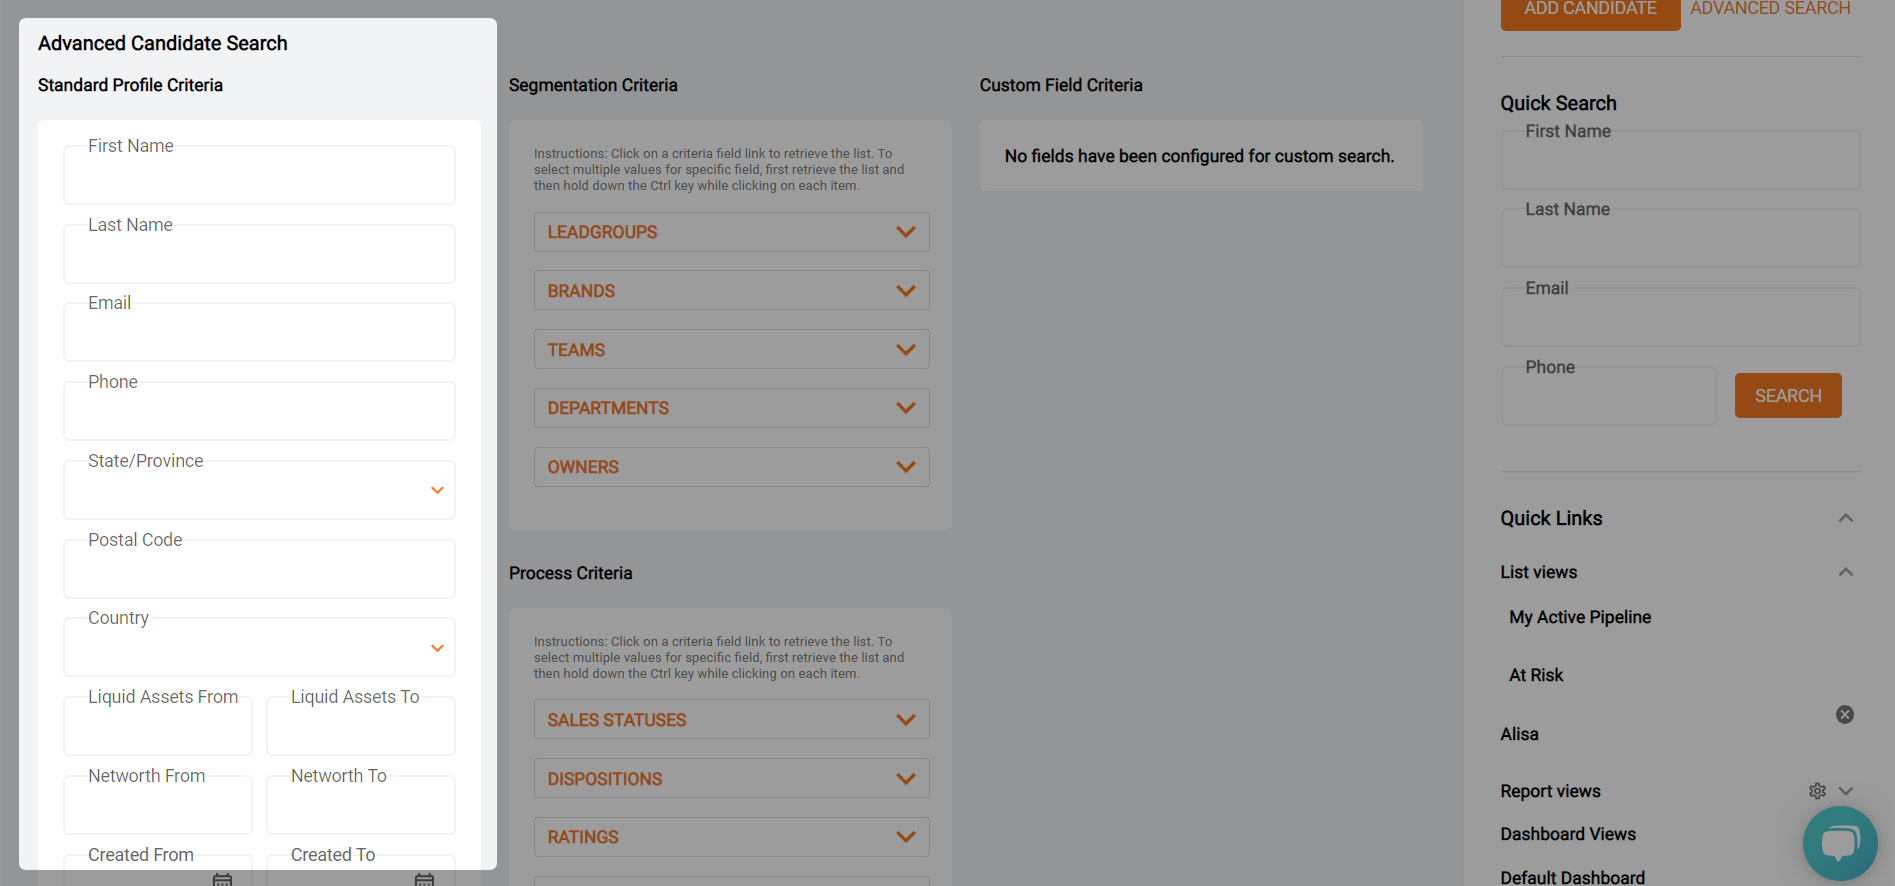
When you click on the link, you will be brought to the following page.

On the left-hand side, you have the “Standard Profile Criteria”. This allows you to search the following fields on a candidate profile:
- First Name
- Last Name
- Phone
- State/Province – Please note that you are only able to search for one state/province at a time.
- Postal Code
- Country – Please note that you are only able to search for one country at a time.
- Liquid Assets – This field has two input fields, allowing you to look for leads within a certain range.
- Networth – This field has two input fields, allowing you to look for leads within a certain range.
The last four fields are Date Range fields, meaning you will be able to set a range between two dates to look for leads matching the criteria set. They are:
- Created – The date the lead was created in the system
- Status Updated – The date the lead’s sales status was updated
- Disposition Updated – The date the lead’s disposition was updated
- Note Update – The date a note was added to the candidate profile.
The last section on the left-hand side is “Custom Field Criteria”. Some customers opt to have custom fields added to their profiles that can be searched. If you opt to have this added to your system, this is where they will appear. If you would like to have this added to the database, please submit a ticket to the Help Desk and our development team will add it for you.
On the right-hand side of the Advanced Search, you will see several different sections. They are broken down like this:
- Segmentation Criteria – How you divide up your leads. You are able to search here via LeadGroups, Brands, Teams, Departments, and Owners.
- Process Criteria – How leads are broken down in your sales process. You are able to search via Sales Status, Dispositions, and Ratings.
- Advertising – Where your leads are coming from. You are able to search for leads via Source Categories, Sources, and Referrals.
The last section is Administrative Criteria and includes one option of “Include Deleted Candidates.” In Lead Management, when a candidate is deleted, it is not truly removed from the system. This is a safeguard in case
the lead needs to be restored. But when a lead is deleted, it will no longer show in any reports unless this option is checked. You will primarily use this option for transferring leads to a new owner or LeadGroup before making the User/LeadGroup inactive/deleting the user/LeadGroup. As we covered earlier, inactive users/LeadGroups cannot be searched for, so it is always advised that you use the Advanced Search to find leads assigned to that user/LeadGroup and transfer them to a new user/LeadGroup. You will want to also check this box before running the search, as deleted leads will not show up otherwise.
Now that we have covered all of the different criteria, searching is as simple as plugging in the criteria you want to find. Let’s say we want to find all leads in Georgia with a Sales Status of “New Lead.” In the “State/Province” drop-down, we would select “Georgia”:
Now under “Process Criteria” we want to click on the link that says “Sales Status”. The link will now become a list, with all the sales statuses available in the database listed. Since we want to search on “New Lead” we will select that status.

You are able to select multiple options under all of the options on the left-hand side. All you will need to remember is to hold down the “CTRL” button when making the selections. Now that we have our options set, we will click the “Search” button at the bottom of the screen.

We will now get our results page. You can see that since we didn’t specify a LeadGroup or any other criteria, it simply pulls all leads that match the criteria we specified.
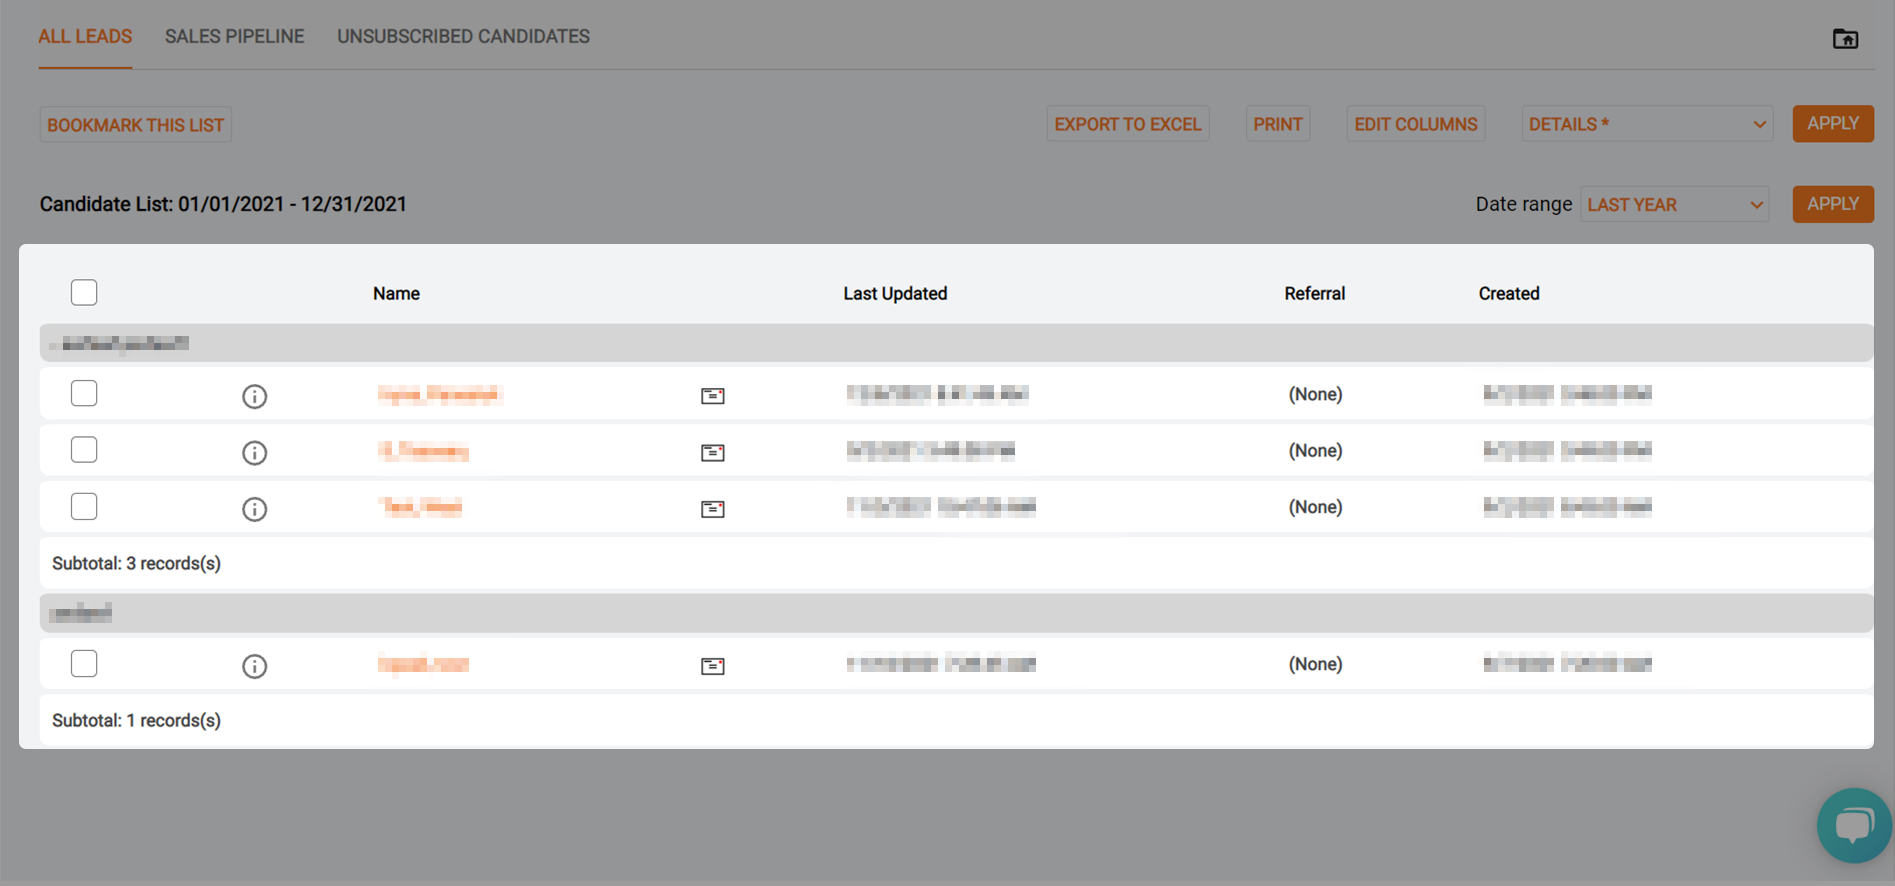
You can use as many different options to make your reports as general and specific as you wish. If you find a report to be of particular value to you, and want to make it easily accessible, you can bookmark it using the “Bookmark This List” link at the top left-hand of the page.

Simply click the link and give it a name that makes it useful to you and hit “Save.” If you want others to be able to see it, all you need to do is check the “Public” box.

A link to this list will now appear under the “Quick Links” section on the right-hand side of the system. As the owner of the list, only you will be able to delete it.

Please be advised if you need to make any changes to the list, you will need to delete it, and then recreate it with the new criteria. If you delete it, it will be deleted from every user’s profile as well. You will need to select the “Bookmark This List”, rename it again, and then check the “Public” box again to share it. You can delete the list by clicking on the “X” to the right of the list’s name.
Another powerful, yet overlooked option in Lead Management is the “Actions” section of the system. This is accessible from any list of data; however, you may find it incredibly useful when used in conjunction with Advanced Search. Let’s go back to the list we pulled of all new leads from Georgia. Say you wanted to change the sales status to all those leads. First, you would need to pull your list.
If you look to the left of the “Name” column header, you will notice a check box. Clicking that box, allows you to check all leads displayed in the list.

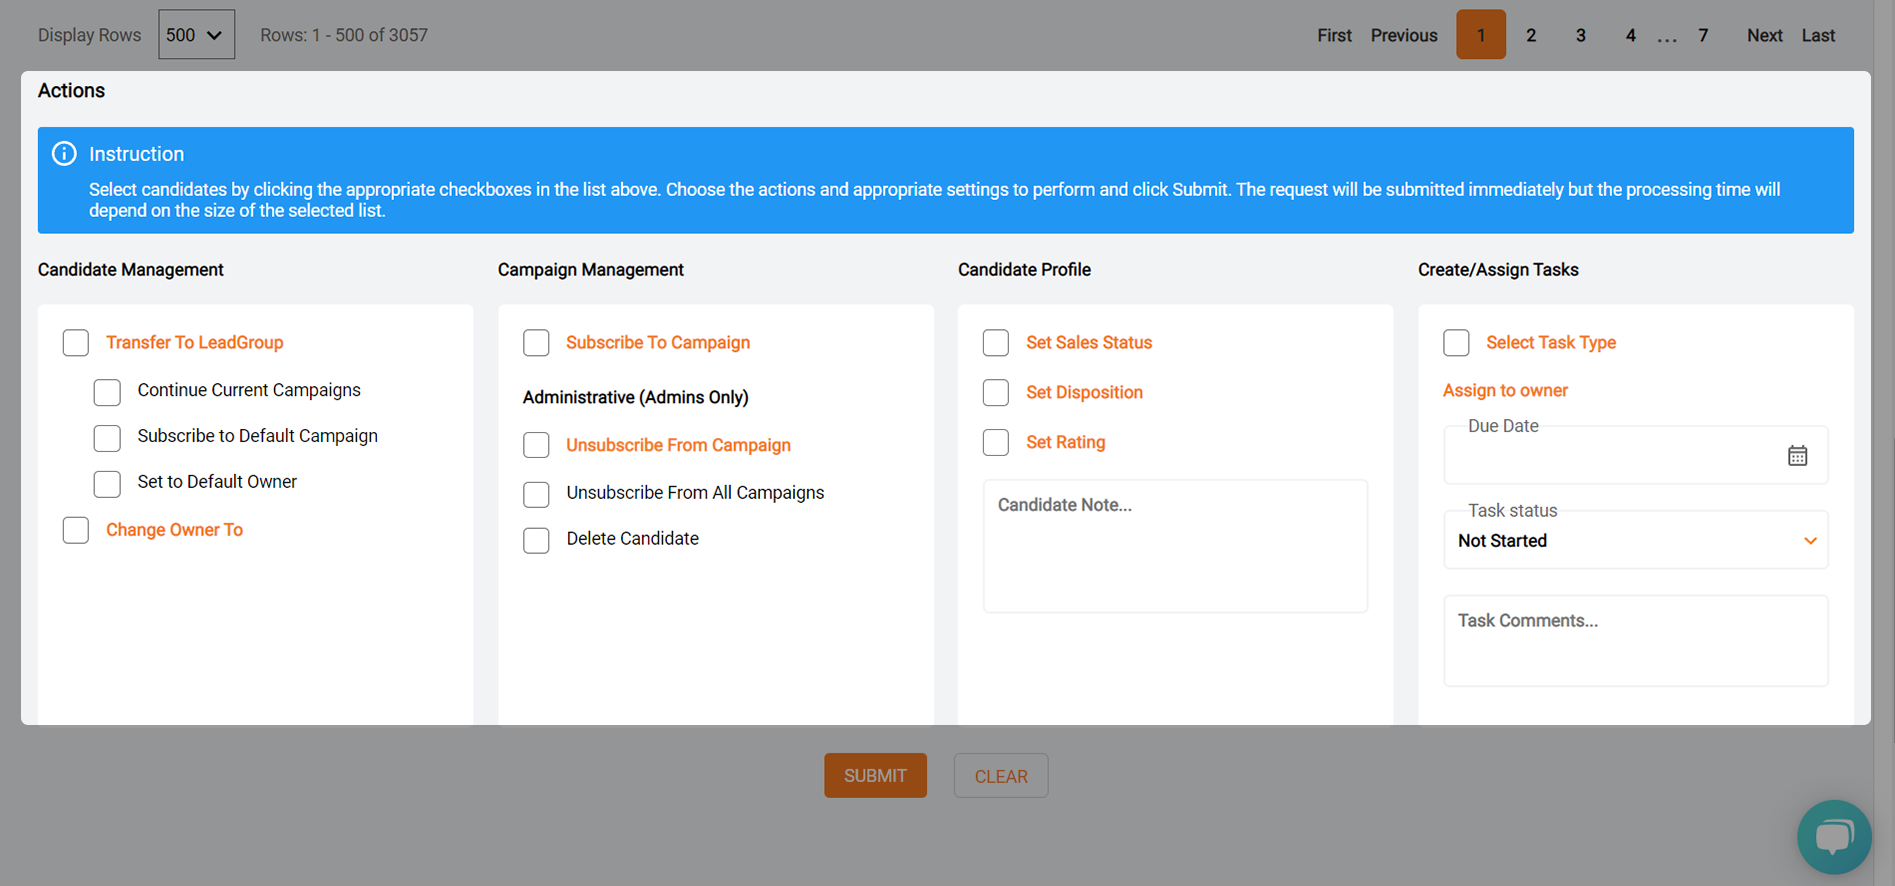
If you scroll down to the area underneath the “grid” where all leads are displayed, you will now see the “Actions” portion of the system.
You have several options to choose from here.
Transfer to LeadGroup – Selecting this option will allow you only send all selected leads to a new LeadGroup. You have a few sub-options that go along with this option.
Continue Current Campaigns – Use this option if the LeadGroup you are switching to has a different default campaign, but you do not want to enroll them in the new one, yet want to continue to send them the campaign from the old LeadGroup.
Subscribe to Default Campaign – Use this option if the new LeadGroup has a different Default Campaign, and you want the leads to start getting this campaign.
Set to Default Owner – Select this option if you want to change the owner of the leads while transferring to the new LeadGroup. Please remember, if you do not select this option, and the owner of the old MaxGroup does not have access or alerts on the new LeadGroup, he will neither see the leads nor receive alerts unless he is signed up for them.
Change Owner to – Select this option if you want to keep the leads in the current LeadGroup, but want to change the owner of them. Please remember, if the new owner of the leads does not have access or alerts on the LeadGroup, he will neither see the leads nor receive alerts unless he is signed up for them.
Subscribe to Campaign – Use this option if you want to subscribe to all leads to a new campaign. When you select this option, a second dropdown will appear called “Send Entire Campaign.” Most people select this option, however, if there is only one message in the campaign you want to send, you would select it here. Please be advised though, that selecting that option will send only that message. If you want the leads to get additional messages after that, then you will need to sign them up for it separately. In other words, the only way to send the campaign with the intervals automatically is to use the “Send Entire Campaign” option.
The next section will only be available to system administrators. Standard and Manager Users will see it, but it will be greyed out to them.
- Unsubscribe from Campaign – Use this option if you wish to discontinue a campaign that leads are currently subscribed to. Like the “Subscribe to Campaign” option, it will change into a dropdown and you can select the campaign you wish to unsubscribe from.
- Unsubscribe From All Campaigns – Use this option if you wish to set all leads select to “Unsubscribed” and discontinue all campaigns to them. Please be advised though, that selecting this option will prevent any future campaigns from being sent to the leads as well. If you choose this option in error, you will need to contact the Help Desk to have development re-subscribe the leads.
- Delete Candidate – Use this option if you wish to mass delete several leads. The leads will still remain in the system, but will not be able to be pulled in reports without using the “Include Deleted Candidates” option on the Advanced Search. If you choose this option in error, you will need to contact the Help Desk to have development restore the leads.
On the right-hand side, you have the following options:
- Set Sales Status – Use this option to mass edit the Sales Status of all selected leads.
- Set Disposition – Use this option to mass edit the Disposition of all selected leads.
- Set Rating – Use this option to mass edit the Rating of all selected leads.
Create/Assign Tasks – These fields must be set concurrently. The first option is the select the task type, you will need to set the owner and due date as well. This will create a new task, and will not edit any pre-existing tasks. If you need to mass edit pre-existing tasks, you will need to contact the Help Desk to have development resolve the issue for you. You can also set the status of the task, as well as add comments if need be using the “Task Comments” field.
Finally, we have the “Candidate Note” field. You will want to use this field if you want to mass-add notes to several candidate profiles.
Let’s now return to our example, we wanted to change the sales status to all leads pulled in our report. Now that the leads are checked, we simply select the “Set Sales Status” box and notice the link becomes a dropdown to select options from.

Let’s go ahead and change these leads to “Contact Attempted”. To do that, we select that option in the dropdown and then hit the “Submit” button on the bottom of the screen.
If we scroll back up, you will now notice all leads have a Sales Status of “Contact Attempted” now.
You are able to select as many options at a time, just as you were when using the “Advanced Search.” Using these two tools in conjunction, you will find it incredibly easy to find and manage your leads using the Lead management system.
Related Articles
How do I add/edit/remove fields from my Candidate Profile/Advanced Form?
How do I add/edit/remove fields from my Candidate Profile/Advanced Form? If you would like to have any form changes made to your Candidate Profile or Advanced Form, you will need to submit a ticket to our Help Desk to request to have those changes ...Subscribing Candidates to Campaigns vs Email Blasts
There are 2 ways to subscribe a candidate to a campaign in Naranga Lead Management. The first method is to subscribe a single candidate through the Campaigns tab in the Candidate profile: The second method is used for sending an email blast out to a ...How to Manage LeadGroups
A LeadGroup is a pivotal part of Naranga Lead Management system. Consider it a “bucket” where you store leads that have something in common. How you choose to separate the leads is up to you, and you can have as many LeadGroups as you choose. You can ...My links aren’t working in campaign emails!
My links aren’t working in campaign emails! If you or a lead clicks on a trackable link in LeadManagement and it takes them to the home page, the link is not set up correctly. The most common cause of this is when the campaign email was created, it ...LeadAlerts
If we want the user to receive alerts when a lead does something in the LeadGroup, we can set those here as well. Once again, the box next to the LeadGroup must be checked, the user affected must be selected, and now we will focus on the "LeadAlert ...