Location Information
Location Information
How to Validate/Edit Location User Information
The user can click on any location from the list and a new area will pop up, displaying Owners and Managers associated to this location. The Location Validation area enables the user to validate/edit the information of the location owners, managers and certified managers.
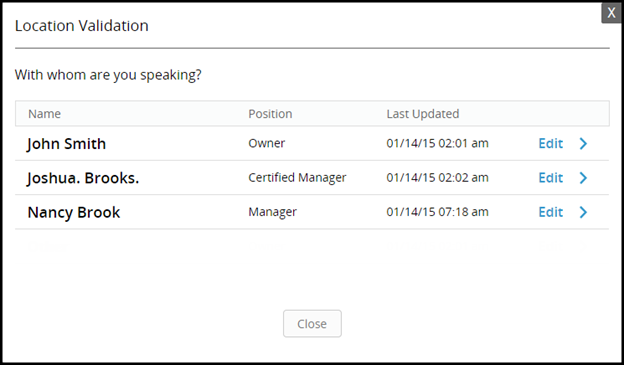
In case an owner, manager, or certified manager of the location is not listed in the ‘Location Validation’ area, the user can proceed further by clicking ‘Others’ in the list.
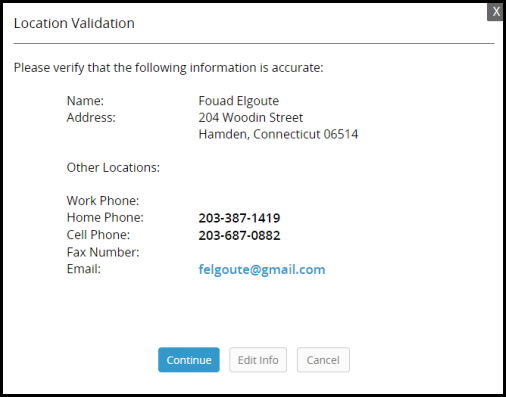
Click the ‘Cancel’ button to go back to the listing, or click ‘Continue’ to view the location inbox.
How to view Location Inbox
After ‘Location Validation’, the user is redirected to the location inbox. The screen displays the location’s vital information, open/closed tickets, and other related information. Details are discussed in the below sections:
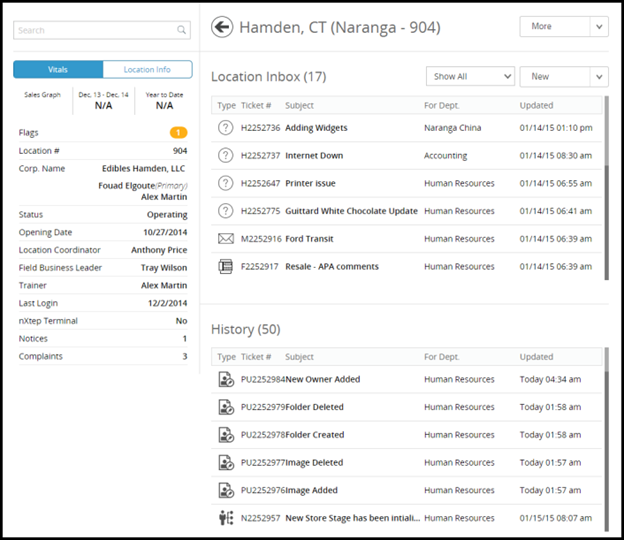
Vitals
The Vitals section enables the user to view a number of useful information about a location. The following vital information is shown:
· Sales Graph: Displays the sales graph
· Last Year Sales: Displays the sales of the last 365 days
· Year to Date: Displays the sales of current year
· Flags: Displays the number of flags associated with this location in a bubble; yellow bubble means less than 5 and red bubble means 5 or more
· Location Number: Displays location number
· Corporate Name: Displays corporate name of location
· Status: Displays status of the Location (Operating, Terminated, etc.)
· Opening Date: Displays opening date of the location
· Location Coordinator: Displays the name of the franchise location coordinator of the store
· Field Business Leader: Displays the name of the FBL for the location
· Trainer: Displays the name of the trainer of the Franchise
· Last Login: Displays the date of the last login to nCompass
· nXstep Terminal: Displays whether or not the nXstep terminal is activated
· Notices: Displays the number of notices
· Complaints: Displays the number of complaints

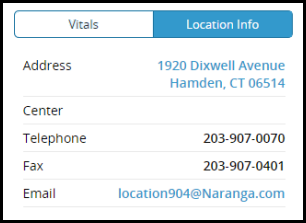
Location Info
‘Location Info’ displays the following general information:
Location Inbox
The location inbox section displays the list of open tickets associated with this store. The following information for tickets are shown:
· Type: This column displays icons to signify ticket type
· Ticket Number: Displays ticket number
· Subject: Displays the subject of ticket
· For Department: Displays name of department the ticket is intended for
· Updated: last updated Date
The upper section displays Location ‘Inbox’ whereas the Lower section displays ‘History’. Location Inbox contains Messages/Activities with an open status while ‘History’ section contains Messages/Activities that have been marked as completed.
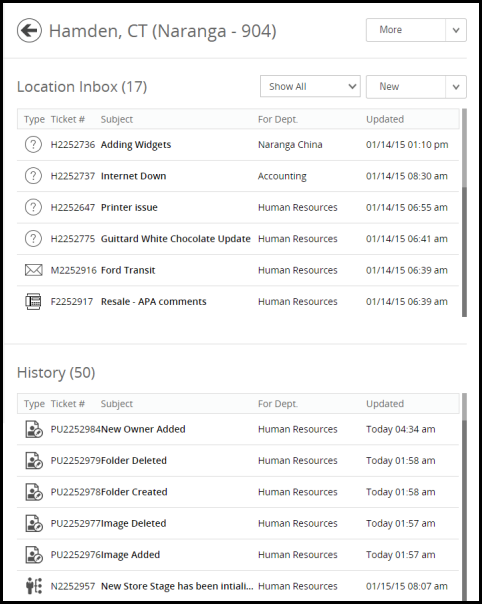
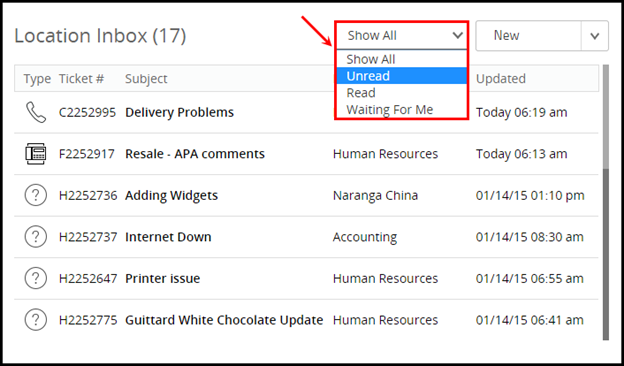
The user can also filter the tickets using the status filter option on the top.
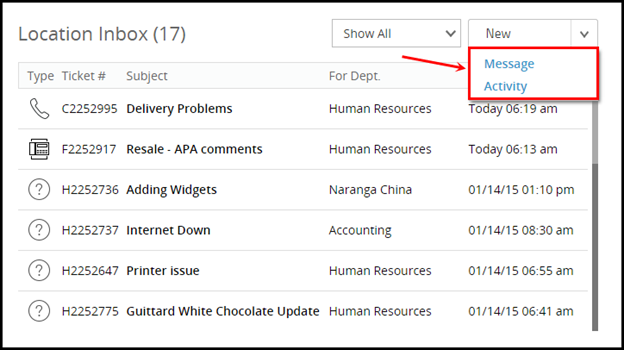
Adding a New Message/Activity
To add a ‘New Message’ or a ‘New Activity’, click on the New drop-down on the top right and select Message/Activity.
drop-down
A new pop up will appear similar to the one shown in the figure below where the user can add the details of the New Message/Activity against the respective fields.
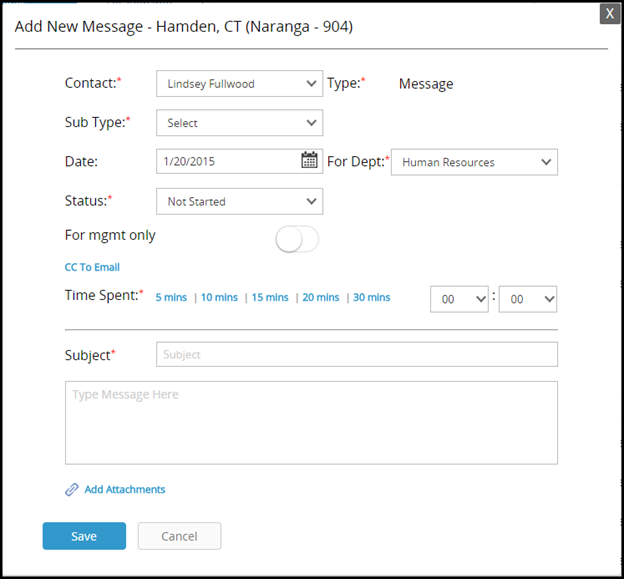
After entering all the fields the user can click ‘Save’ to save the new activity or click ‘Cancel’ to cancel it.
Viewing More Options
The user can view more options for the location by clicking on the ‘More’ drop-down in the top right area.
drop-down
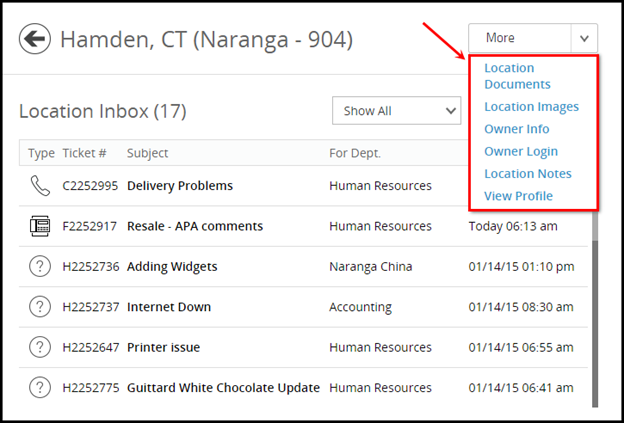
How to view Location Documents
The user can view Location Documents by clicking on the ‘More’ drop-down in top right and then clicking on the Location Documents option. The user will be redirected to the Compliance Module for ncompass showing all documents associated with this location.
drop-downHow to view Location Pictures
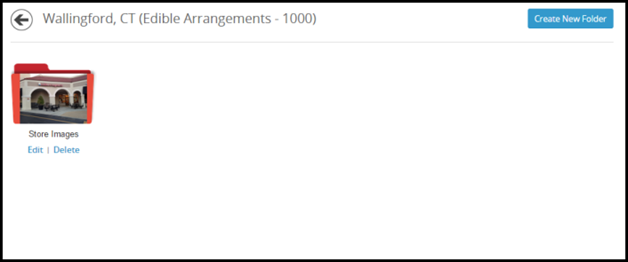
The user can view Location Images by clicking on the ‘More’ drop-down in the top right and then clicking on the Location Images option. The user will be redirected to the Compliance Module of ncompass showing all Pictures associated with this location. The user can also add or remove pictures and folders.
drop-down
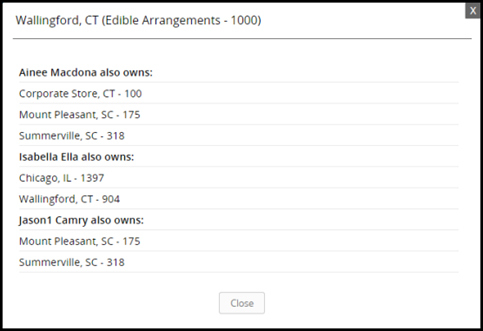
How to view Owner Info
The user can view ‘Owner’ information by clicking on the ‘More’ dropdown in the top right and then clicking on ‘Owner Info’ option. A new pop up will appear that will display owner(s) associated with this location. In case of multi-unit owners the system will show other locations owned by owner(s).
How to login as owner from nCompass Franchisee End
The Owner Login option enables users to log in to the Franchisee area from the owner(s) account. The user can log in from the owners area by clicking on the ‘More’ drop-down in the top right and then clicking on the ‘Owner Login’ option.
drop-downHow to login as Location user from nCompass Franchisee End
The user can also log in to the Franchisee area using the store’s credentials by selecting the ‘Store Login’ option from the top right in the dropdown menu. This option helps users to identify and troubleshoot certain issues reported by location users.
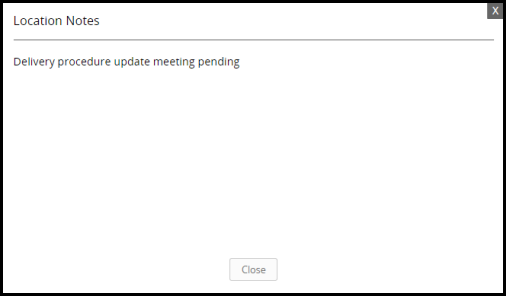
How to view Location Notes
The user can also view Location Notes by clicking on the ‘Location Notes’ option from the ‘More’ dropdown.

Related Articles
Financial Information
Financial Information The Financial Information section displays the Finance related important information of the selected store. The user can view: · Location Financial Information o Royalty o NAF o Tax Rate o Min Royalty o Franchise Fee · Recurring ...Vehicle Information
Vehicle Information The Vehicle Information section contains all the details of the vehicles for the selected location. The user can add information of new vehicles, edit, and delete vehicle information in this section. Clicking on Vehicle ...How do I add location documents?
How do I add location documents? -The Documents section enables the user to manage all the documents for the selected location. The documents are sorted in folders and the user can navigate through the folders to locate the desired document. By ...Compliance Info
Compliance Info Compliance information of the location will display the following: · General Information · Location Information · System Information · Insurance Information The user can edit this information by clicking on the Edit link on the top of ...How To Delete A Location
How To Delete A Location To Learn How To Delete A Location Click Here