Editing Reports
Editing Reports
If you look to the right of the “Pivot View” dropdown, there is a link there labeled “Open Editor”. If you click on that link, you will see an editor open up above the report.
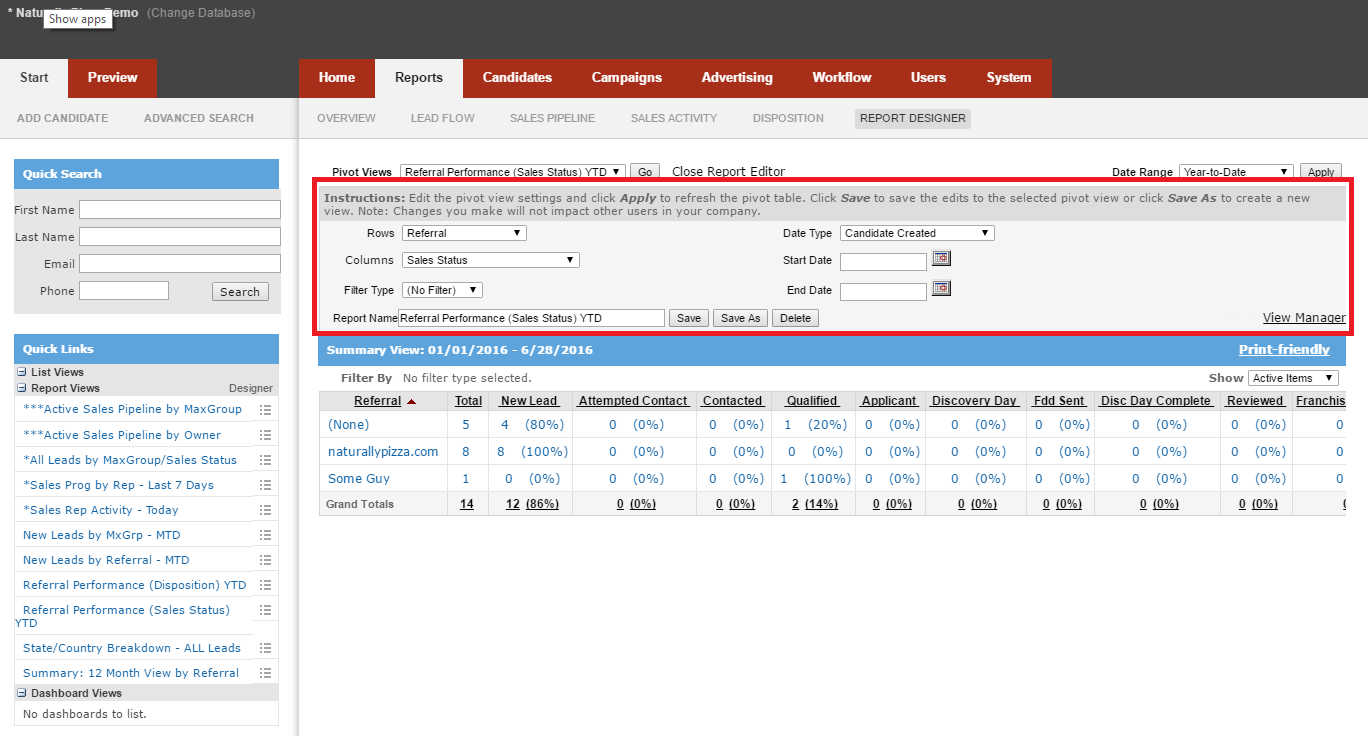
The editor will have seven fields that can be changed. They are as follows:
- Rows: How you want to group the information
- Columns: What information you want displayed
- Filter Type: If you want to limit the amount information displayed to one particular piece of information, you will use use this field. Please note, if you opt to use this field, an eight field will appear called "Filter by" which will allow you to filter based on the criteria we selected. In this example, we chose to filter by "Referral". This showed the eight field which then contained the "Referrals" so we could pick one particular one to look at.
- Pivot Name: This is the name of the report you are looking at. You can change it to make it something more understandable to you. Also, when you are creating a new report, you can name it here.
- Date Type: It contains six options:
Candidate Created:
This is simply a tracking of when the lead was created. If you track leads in the last 30 days, and the creation date is greater than 30 days, those leads will not show in this report.
Candidate Activity: This tracks any activity on the candidate for the time frame specified. If you are tracking the last 30 days, if there was any activity on a lead in that timeframe, it will show here.
Sales Status Update: This is a tracking of any updates such as sales status to a lead that occurred in the time frame specified. Going back to our previous example, if you are tracking the last 30 days, and the lead changed it's sales status in that timeframe, it will show.
Sales Status Progression: This is a very valuable option, in that it will show the "lifeline" of the lead. It will actually go through and track the lead at each sales status it has been at in the timeframe specified. For example, if a lead has been at three different sales statuses in the last thirty days, it will track the lead at each one of those statuses.
Created/Sales Progression: Similar to the "Sales Status Progression" date type, this will only track leads created in the timeframe specified, however it will still track their progression as well.
LeadGroup Transfer: This shows the leads that were transferred to different MaxGroups in the timeframe specified.
- Start Date: The time you want the search period to begin
- End Date: The time you want the search period to end.
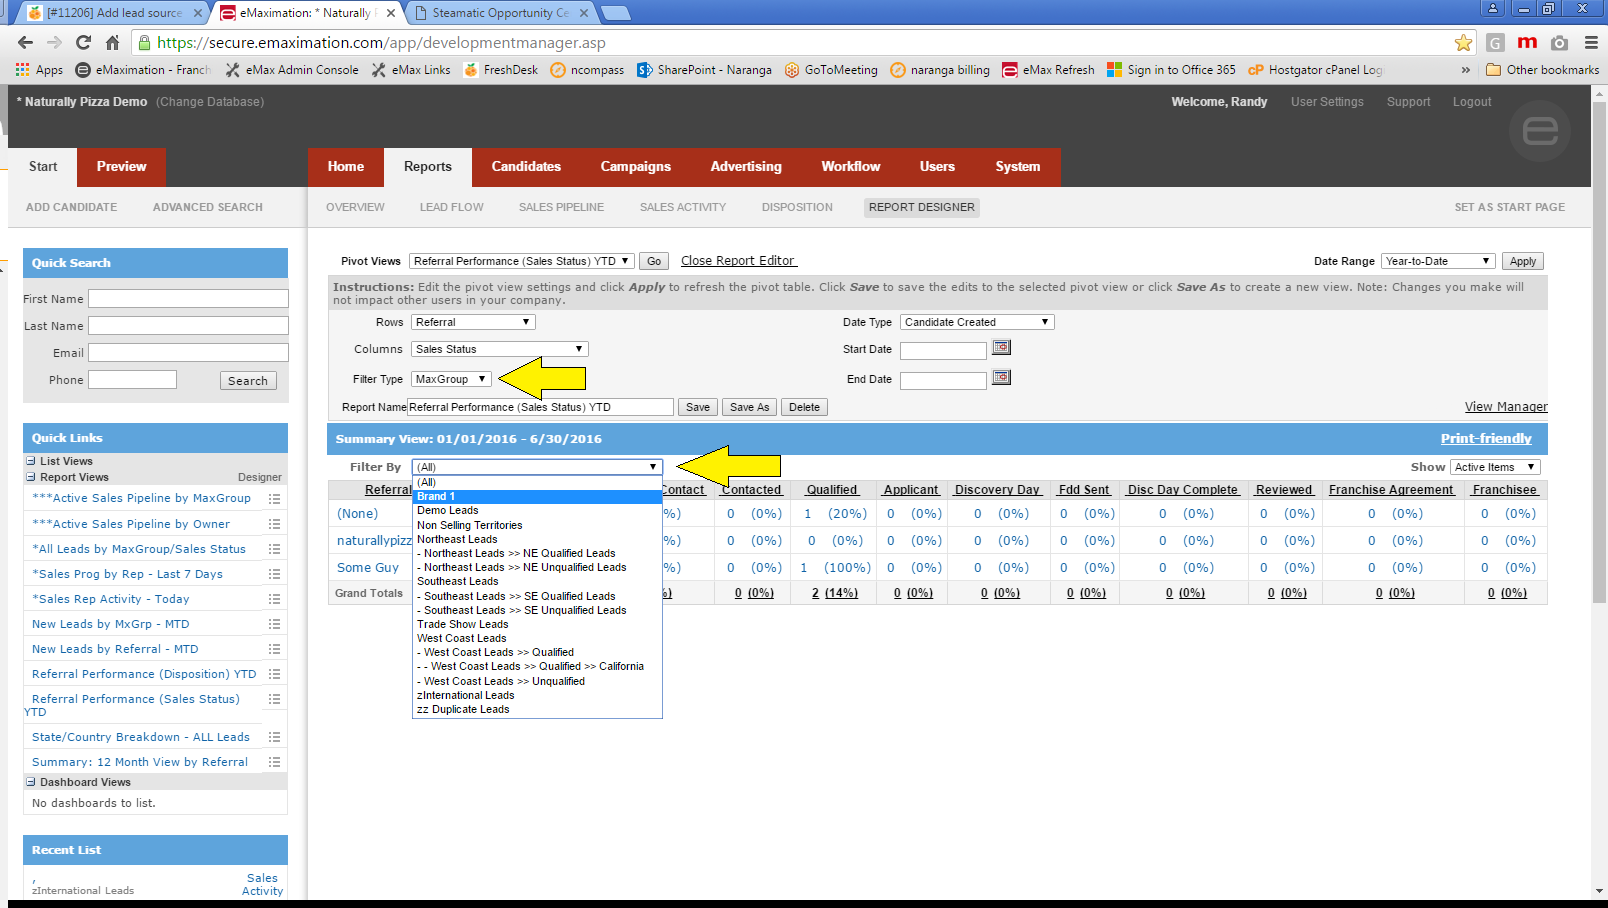
*** Selecting "Filter Type" shows the "Filter By" field with all options contained in the field
Once you are satisfied with the state of the report, to save it you simply go to the "Pivot Name" field and enter in a name that makes sense to you. We recommend naming the report what it is, in this case, a report of "Disposition by Owner."
If you are creating a brand new report, and wish to keep the pre-existing report, please hit the "Save As" button, as hitting "Save" will overwrite the old report. If you just want to make changes to an existing report, then you will want to hit the "Save" button.
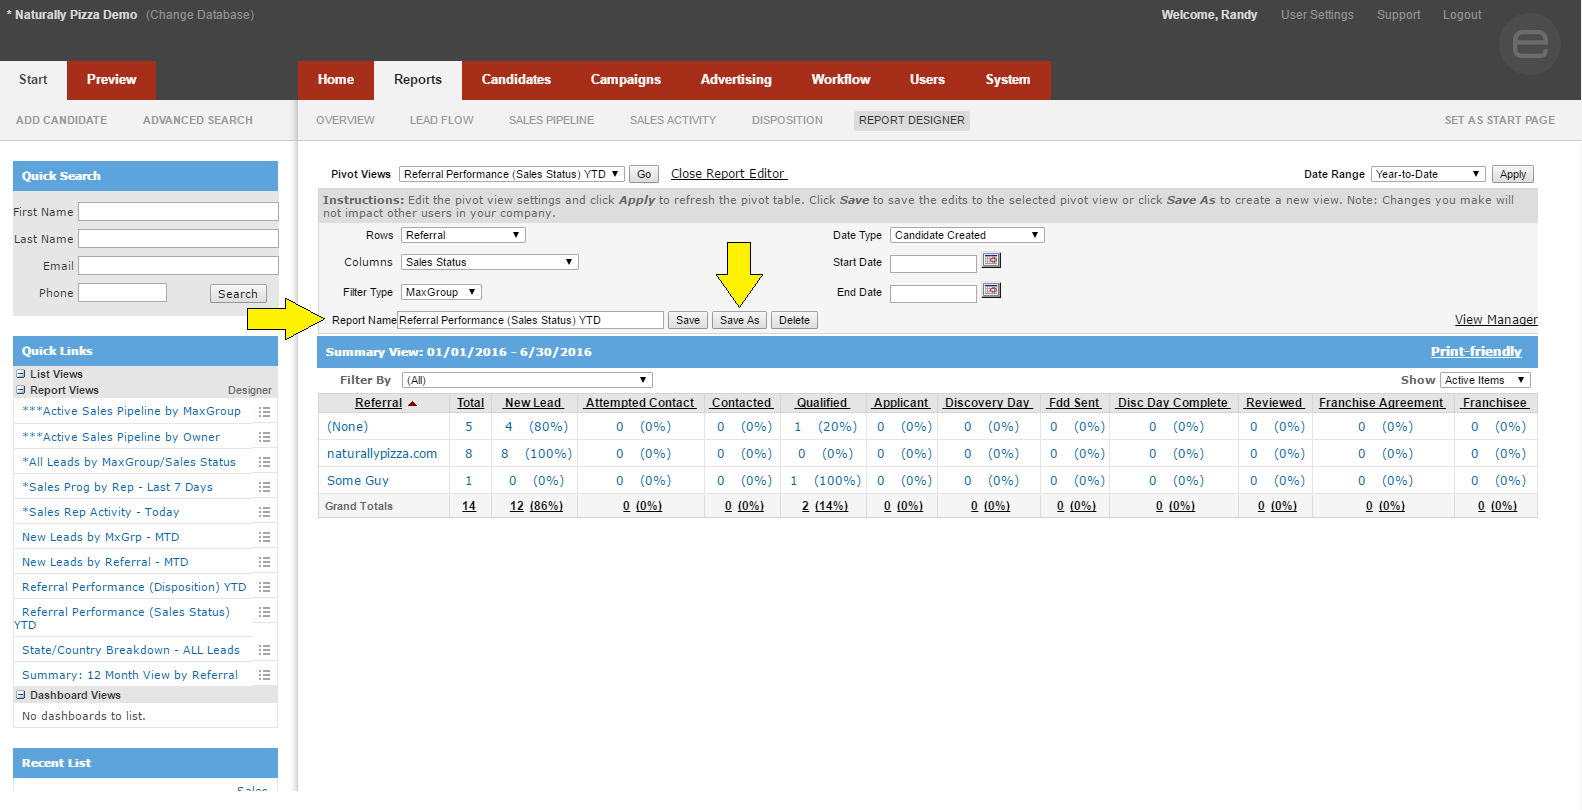
***Type the name in the "Report Name" field and click "Save As" for a brand new report.
***Type the name in the "Report Name" field and click "Save As" for a brand new report.When you save the report, it will now appear on the left hand side under your "Report Views" for easy access.
This view is specific to your account only. If you wish to share it with other users, you will need to use the "View Manager" in the "Report Editor".
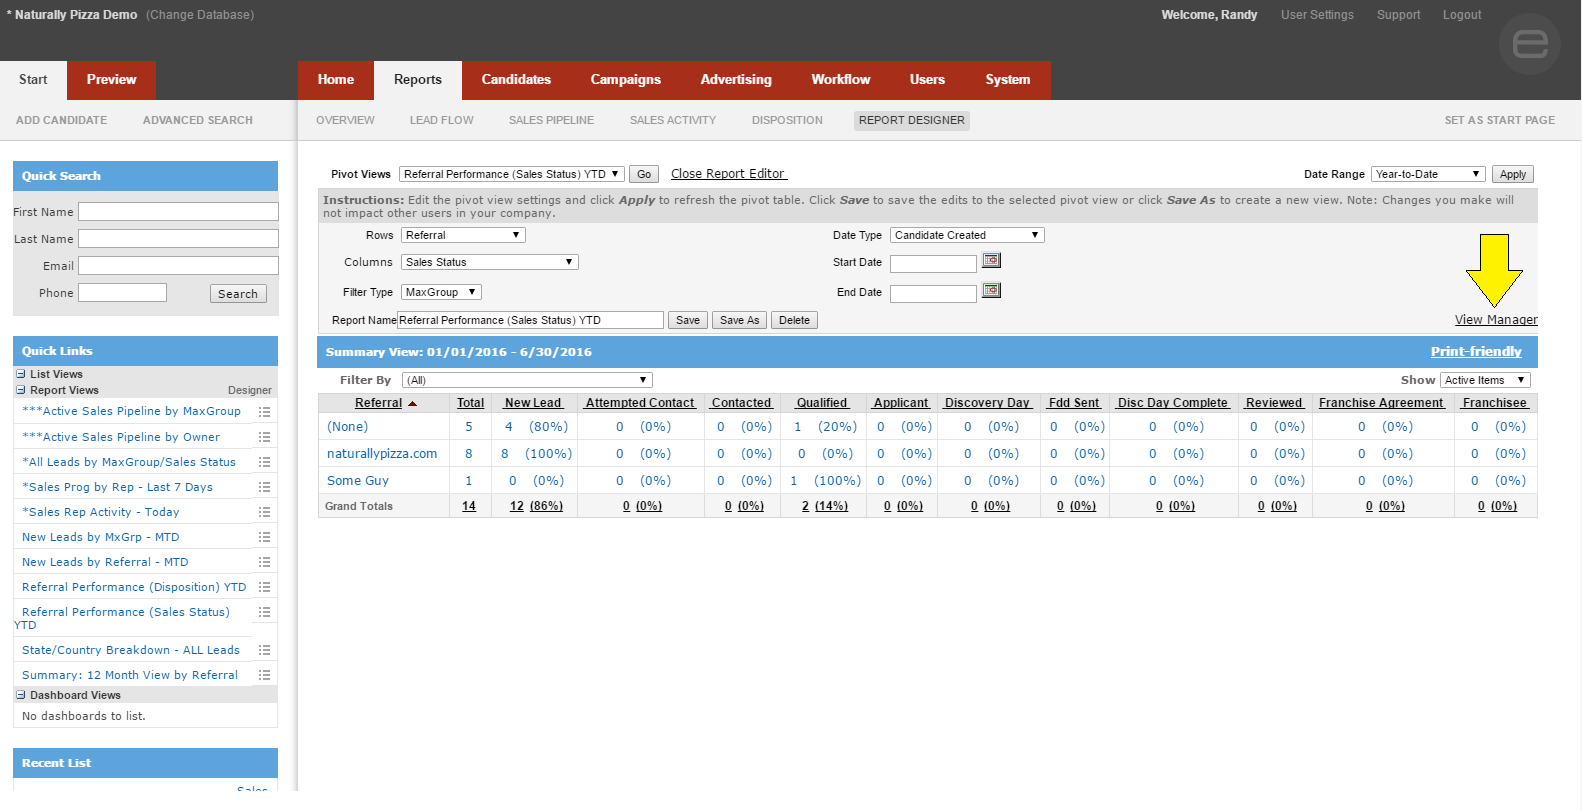
Clicking on this link brings you to the "LeadPivot View Administrator" screen. You can either Add to another user's current view or completely replace what they see with reports you "send" them.
First, select the view(s) you would like to copy. Then select the user(s) you would like to copy the view to. Then click the "Copy Views" button.
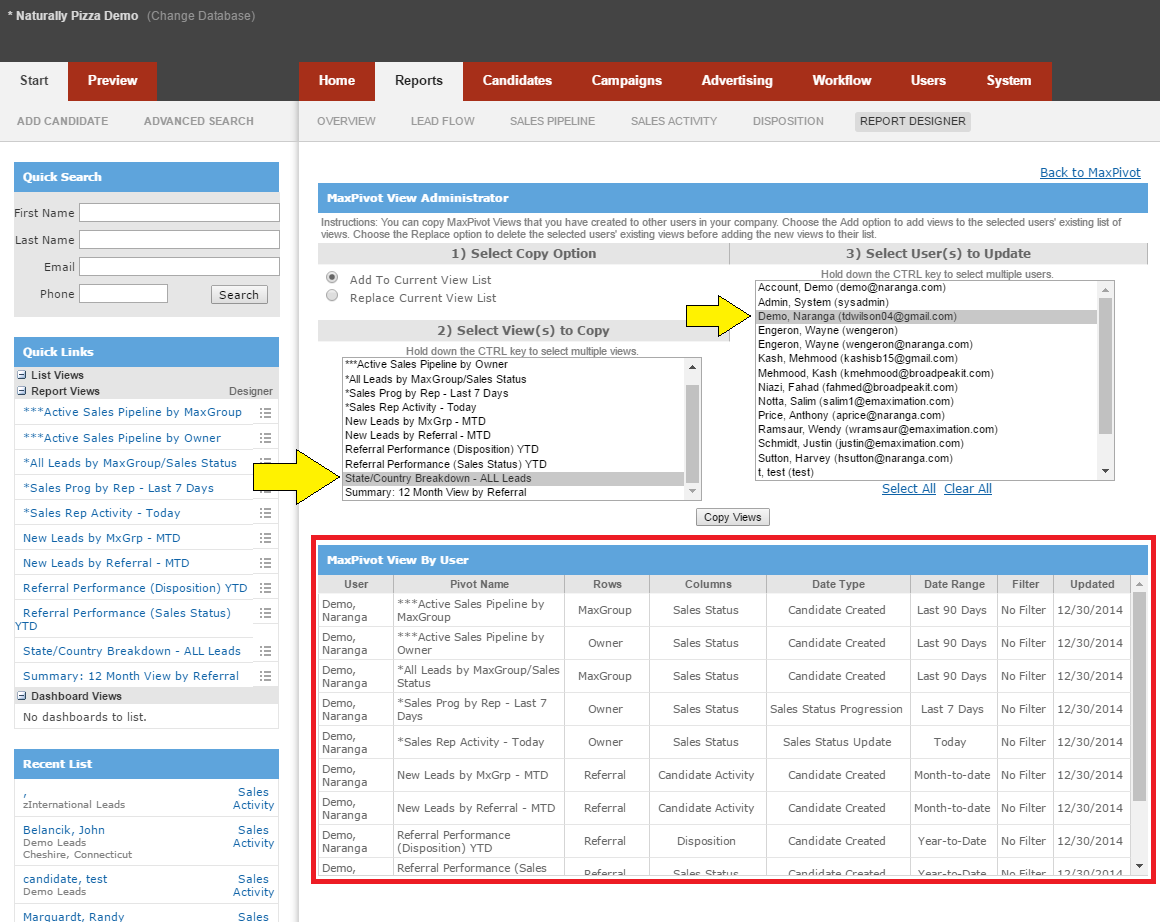
Notice when a user is selected, their report views will populate in the area under the "Copy Views" button. This allows you to see what their current views are.
Related Articles
Editing Column Views
Editing Column Views Once you have the list of leads, you may want to change the data being shown in your list. This is done by editing "Column Views". A "Column View" is the information displayed in a list view. It can only be accessed with a list ...Report Management
Report Management Report Management Naranga Lead Management database provides powerful reports that allow you to see how many leads you have and where they are in your pipeline. There are several ways to create and access reports. The first and ...How do I add/edit/remove fields from my Candidate Profile/Advanced Form?
How do I add/edit/remove fields from my Candidate Profile/Advanced Form? If you would like to have any form changes made to your Candidate Profile or Advanced Form, you will need to submit a ticket to our Help Desk to request to have those changes ...List Views
List Views Another powerful feature of eMax is that the system allows you to “drilldown” into the reports and view al the leads that match the criteria you are looking for. For example, let’s look at the “Active Sales Pipeline” report. If you look at ...How to Manage LeadGroups
A LeadGroup is a pivotal part of Naranga Lead Management system. Consider it a “bucket” where you store leads that have something in common. How you choose to separate the leads is up to you, and you can have as many LeadGroups as you choose. You can ...