Creating an Email Campaign
Email Campaigns
Creating a new campaign is a very simple process. The first step is to find and click the "Add Campaign"

When you click "Add Campaign" you will be taken to recognize at a glance. Please try to keep the name under one hundred characters within the system. You can set a logo and contact info if you wish, but the two most important fields on this page are the "Campaign Name" and the "Active" check box. If the "Active" Box is not checked the campaign will remain inactive and you will not be able to test the campaign or send it out.
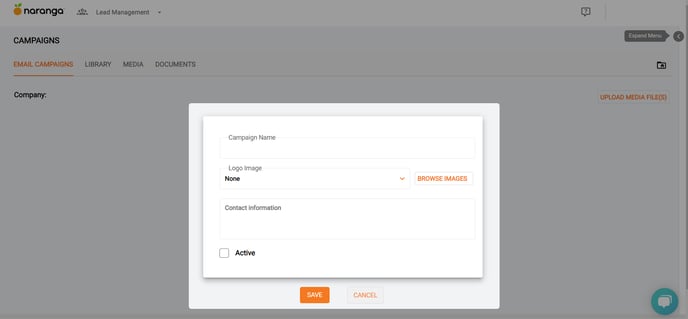
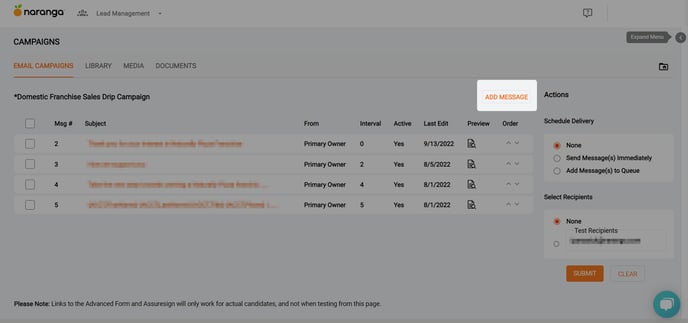
Once you have your fields filled out, hit save and you will take to the Message Center. At this point, there will be nothing on this page, but this is where you will need to go to create/edit all messages. Click the "Add message" link to create a new message.
Now you will be on the "Message Body" From here there are several fields appropriately. They are listed below.
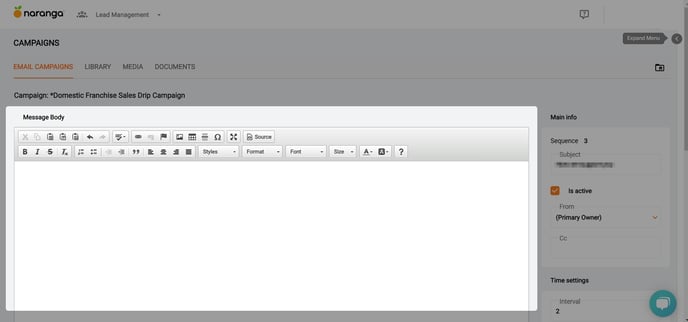
Subject Line: this is what leads will see in their inboxes when the message arrives. It is a required field, and it has a one hundred character limit in it.
Active: this must be checked in order for the email to be available to be tested or sent to candidates.
From: It defaults to "Primary Owner" and our Best Practices suggestion is to leave it on this field. This instructs the system to pull the sender's information from the user profile assigned as the owner of the campaign. Keeping the owner of the campaign consistent throughout the entirety of the campaigns will eliminate any confusion for the candidate. This option allows the same email/campaign to be shared by multiple users. And, if a lead is reassigned to a different broker, it will automatically pull that new broker's name, as opposed to someone they are no longer working with.
Some unique situations call for very specific signature line information. In this case you can choose to make the "From" field a static value by accessing the drop down list of all users available in your company database. This requires that their signature information be set up separately in their User Profile.
Interval: Think of this as a "delay" on when to actually send the email. If it is set to "0", the email will go as soon as a candidate is enrolled. If you have more than one email in the campaign, the interval will determine when the next email is sent out. It is very important to remember that the interval counts from the when the previous email was sent.
For example, if the first email has an interval of "0" and the second has an interval of "2", the second email will go out two days after the first one. If there is a third email in the campaign, and it has an interval of "3", it will go out three days after the second email, and five days after the first. This will continue for each subsequent email.
Send Time: Determines what time of the day the email will be sent.
Weekday Only: Prevents any emails from being sent on a weekend.
Default Webmercial: The "Default Webmercial" field will not contain anything if you have not created any webmercials for your company. If this field is blank, as it is in this example, you can disregard the field. Webmercials are web pages that contain content such as flash, audio/video, and animation.
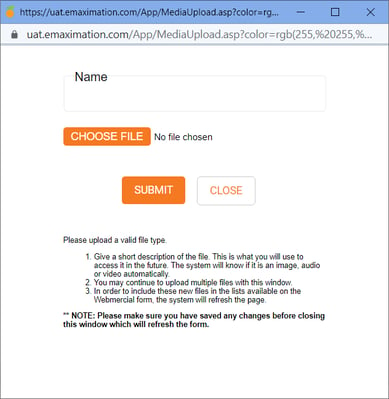
- Upload Media Link: From here, you are able to upload pictures that you can embed in your emails. Please note you will only need to do this if you do not have your pictures hosted somewhere else that can be accessed publicly. Clicking on the "Upload Media" link will bring up the following popup. Simply follow the prompts and upload the picture in question.
Browse Images Link: Brings up a second window that has all of your pictures included in it. Clicking on an image will it insert it into the email.
Insert Data Field: This allows you to set variables that allow you to "mine" data from Lead Management to personalize the email. When you click the dropdown, you will notice it is segmented into three different sections: "Candidate Fields", "Account Fields", and "Other Fields/Links." If you want to automatically generate information about the specific lead you are sending to (such as their name) you will use the "Candidate Fields."
For example, if you want their name and a salutation to start the email, you would type the word "Dear" to start the email. You would then hit the spacebar and leave your mouse in that position. Go to the "Insert Data Field" dropdown and select the first option, "First Name" and then the "Insert" button immediately to its right. When you do this, you will notice some new information is in the email now.
That information checks Lead Management to pull the first name of the person you are sending the email to. As long as there is information in that field, it will place it in the email. We added a comma after the variable so the email will be grammatically correct.
You can use this same field to create a signature based on who is sending the email. In this case, you would use the "Account Fields." Again, you would need to place the cursor where you want the information to appear on the screen, and then go to the "Insert Data Field" dropdown and move to the "Account Fields".
Insert Trackable Link: This is where you add links that you wish your leads to click on for more information that you can track through their candidate profiles. There is another section where you will add the links, but for now, let's focus on adding it to the email.
Once again, you will need to place your cursor in the section where you wish to have the link displayed. Once you do that, please go to the "Insert Trackable Link" field and select the link you wish to insert. When you have done that, click the "Insert" button to the immediate right of the dropdown and your link will now appear in the email.
Once you are satisfied with the email, hit "Save". You will see a popup that will require you to add an "Unsubscribed" link. All active messages must contain one in order for the emails to be in compliance with best practices.
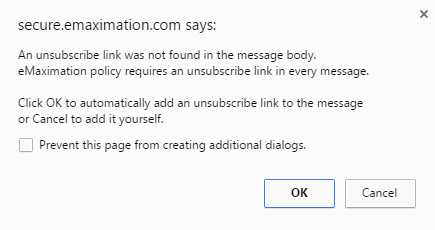
Select "Ok" and the unsubscribe link will be added to the email.
Related Articles
Creating automated tasks in Naranga Lead Management
Creating automated tasks in Naranga Lead Management Tasks in eMax allow you to send reminder emails to yourself and other users in your system to remind them of certain tasks they must perform to help move your lead through the Pipeline. If you would ...Subscribing Candidates to Campaigns vs Email Blasts
There are 2 ways to subscribe a candidate to a campaign in Naranga Lead Management. The first method is to subscribe a single candidate through the Campaigns tab in the Candidate profile: The second method is used for sending an email blast out to a ...My links aren’t working in campaign emails!
My links aren’t working in campaign emails! If you or a lead clicks on a trackable link in LeadManagement and it takes them to the home page, the link is not set up correctly. The most common cause of this is when the campaign email was created, it ...User Email - Email Integration
Naranga Lead Management has the capability to sync with your email and track email communication between your email and the candidate. Once enabled the email communication between you and the candidate will be displayed in the Emails tab of the ...How do I find my email address for leads?
How do I find my email address for leads? eMax can be set up to allow your corporate website and other portals to send leads to you that will be automatically entered into your database. In order for these leads to be accepted, you will need to ...